Handyman blog, tips, and tricks
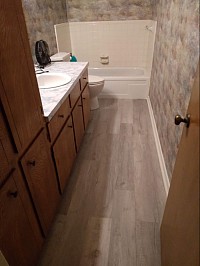
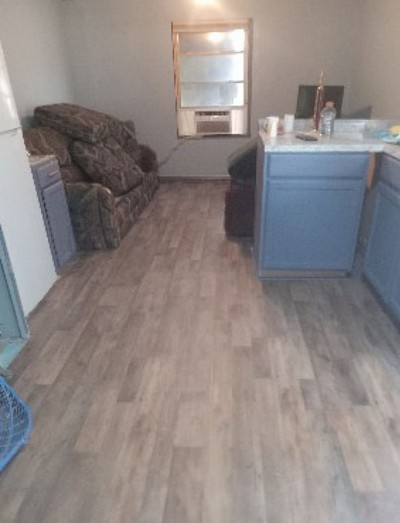
Don't let gaps ruin your vinyl plank flooring - here's how to fix them!
Ever wounder how to remove the gaps in your vynal plank flooring and just cringed at the idea of having to pull it up.Than you should try this first.
Materials need
1.Hammer
2.double sided tape
3.2x4x2
4.vacuum
In order to keep from pulling up your plank flooring just to fix a gap thtat has come about over time; try this handyman trick. All you will need is a vacuum, double sided tape, a 2x4 and a hammer.
First you must vacuum out the gas so tht there is nothing in the way of the planks sliding back together.
Next you take the double sided piece of tape and stick it to a 2x4. Press it on there firmly and stick other side of tape to the plank flooring.
Now with a hammer tap the 2x4 kinda hard and knock the plank back in place.
Finally remove the tape and the 2x4 from the plank and put your materials away.
Removing a gap in your plank flooring now know longer needs to be a 2 hour job just to fix a gap.
How to Redo Sub-Flooring: A Step-by-Step Guide
The sub-flooring of a house is an essential part of its structure, providing a solid foundation for the rest of the flooring to be installed on top of. Over time, sub-flooring can become damaged due to wear and tear, water damage, or other factors. When this happens, it is important to address the issue and redo the sub-flooring to ensure the stability and safety of your home. In this blog, we will discuss the step-by-step process of how to redo sub-flooring.
Step 1: Assess the Damage
The first step in any home renovation project is to assess the damage. Take a walk around your home, paying close attention to the floors. Look for any signs of water damage, such as staining or warping. You should also check for any soft spots or squeaky areas. These are all indicators that your sub-flooring may need to be redone.
Step 2: Gather Supplies
Once you have identified the areas that need to be redone, it’s time to gather all the necessary supplies. Here is a list of some essential tools and materials you will need:
- Safety gear (goggles, gloves, mask)
- Pry bar
- Hammer
- Circular saw
- Tape measure
- Chalk line
- Underlayment
- Plywood sheets
- Screws
- Nails
- Leveler compound
- Floor adhesive
Make sure you have all these supplies ready before you begin the project.
Step 3: Remove the Old Sub-Flooring
Now that you have all your supplies ready, it’s time to remove the old sub-flooring. This can be a labor-intensive process, so it’s important to take your time and be careful. Start by removing any baseboards or trim around the perimeter of the room. Then, using a pry bar and hammer, carefully remove the old flooring. If the flooring is nailed down, use the pry bar to lift the boards and then pull out the nails.
Step 4: Repair Any Damage
With the old flooring removed, now is the time to address any damage to the sub-flooring. If you notice any soft or rotten spots, you will need to replace those areas with new plywood. Use a circular saw to cut out the damaged section, making sure to cut along the floor joists. Then, measure and cut a new piece of plywood to fit in its place. Secure it with screws or nails, and make sure it is level with the rest of the sub-flooring.
Step 5: Install Underlayment
Underlayment is a thin layer of material that goes on top of the sub-flooring and provides a smooth surface for your flooring to be installed on. It also helps to reduce noise and prevents moisture from seeping into your flooring. Roll out the underlayment over the entire sub-flooring, making sure to overlap the edges by a few inches. Use a staple gun or adhesive to secure it in place.
Step 6: Lay Down New Plywood
Once the underlayment is in place, it’s time to install new plywood on top of it. Measure and cut the plywood sheets to fit each section of your sub-flooring. Make sure to leave a small gap between each sheet to allow for expansion. Lay down the first sheet, making sure it is flush against the wall. Use screws or nails to secure it to the sub-flooring and joists below. Continue this process until all sections of your sub-flooring are covered with new plywood.
Step 7: Fill in Gaps and Level Out
After all the plywood sheets are installed, you may notice small gaps between them. Fill these gaps with a leveler compound, which will create a smooth surface for your flooring. Follow the instructions on the product carefully to ensure proper application. Once the compound is dry, sand down any rough spots to create an even surface.
Step 8: Install Your New Flooring
With the sub-flooring redone and leveled, it’s time to install your new flooring. Follow the manufacturer’s instructions carefully for the best results. Depending on the type of flooring you choose, you may need to use adhesive or nails to secure it in place.
Step 9: Add Finishing Touches
Once your new flooring is installed, it’s time to add the finishing touches. This includes reinstalling baseboards and trim, filling in any remaining gaps with caulk, and giving the room a good clean.
Congratulations! You have successfully redone your sub-flooring and created a sturdy foundation for your home.
In conclusion, redoing sub-flooring may seem like a daunting task, but with the right tools and methods, it can be done efficiently and effectively. Remember to take your time, follow safety precautions, and seek professional help if needed. By following these steps, you will have a solid sub-flooring that will last for years to come. Happy renovating!
"Transform Your Bathroom in 2 Weeks: A Step-by-Step Guide to Remodeling in Record Time"
Remodeling a bathroom can be an exciting and rewarding project, but it can also feel overwhelming and time-consuming. The thought of living without a fully functioning bathroom for weeks or even months may deter some homeowners from starting the process. However, with a solid plan and some careful preparation, it is possible to remodel your bathroom in just two weeks or less. In this blog, we will guide you through the steps to transform your bathroom in record time.
Step 1: Create a Plan
Before diving into any remodeling project, it is essential to have a clear plan in place. This includes setting a budget, deciding on a design, and creating a timeline for each task. Take some time to assess what you want to change in your bathroom and make a list of priorities. This will help you stay on track and avoid any last-minute changes that can delay the project.
Step 2: Gather Inspiration
Now that you have a plan in place, it's time to gather some inspiration. Browse through home decor magazines, Pinterest, or Instagram for ideas on design, color schemes, and materials. This will help you visualize the end result and give you a better idea of what you want for your bathroom.
Step 3: Order Materials
Once you have a design and budget in mind, it's time to order the necessary materials. This includes tiles, fixtures, lighting, and any other accessories you may need. Be sure to order everything well in advance to avoid any delays or backorders.
Step 4: Prepare the Space
Before starting any demolition or construction work, it's crucial to prepare the space properly. This includes removing all items from your bathroom and covering any remaining fixtures or furniture with plastic sheets. It's also essential to shut off the water supply and electricity to the bathroom before beginning any work.
Step 5: Demolition
Now comes the fun part – demolition! This is where you will need to remove all existing fixtures, tiles, and cabinets to make way for the new design. It's important to take safety precautions during this step, such as wearing protective gear and using proper tools. It's also crucial to dispose of all materials responsibly.
Step 6: Plumbing and Electrical Work
Once the space is clear, it's time to focus on any necessary plumbing and electrical work. This includes installing new pipes, wiring, and outlets as needed. It's crucial to hire a professional plumber and electrician for this step to ensure safety and proper installation.
Step 7: Install New Fixtures and Tiles
With the plumbing and electrical work completed, it's time to start installing the new fixtures and tiles. This includes the bathtub, shower, sink, toilet, and any other accessories you may have purchased. Be sure to carefully follow the instructions for installation or hire a professional for this task if needed.
Step 8: Paint and Finishings
With the fixtures installed, it's time to add some color and finishing touches to your bathroom. Painting is a quick and easy way to transform the look of any space. Choose a color that complements your design and adds a fresh, clean look.
Step 9: Install Lighting and Accessories
Lighting is an essential element in any bathroom remodel. Install new light fixtures that provide ample lighting for your space. You can also add some decorative elements such as mirrors, shelves, and towels to complete the look.
Step 10: Final Touches
The final step in your bathroom remodel is adding some final touches to tie everything together. This includes adding a shower curtain, bath mat, and other small accessories that bring your design together. Stand back and admire your newly remodeled bathroom.
Tips for a Successful Bathroom Remodel in 2 Weeks:
- Stick to your plan and budget to avoid any delays or added costs.
- Hire professionals for tasks such as plumbing and electrical work to ensure safety and proper installation.
- Prepare the space properly before starting any work to avoid damage to existing fixtures or furniture.
- Order materials well in advance to avoid any backorders or delays.
- Don't be afraid to ask for help from friends or family if needed.
- Be flexible and prepared for unexpected challenges that may arise during the remodel.
In conclusion, with careful planning, preparation, and efficient execution, it is possible to remodel your bathroom in just two weeks. By following these steps and tips, you can transform your bathroom into a beautiful, functional space in record time. So, don't let the fear of a long and tedious remodeling process stop you from creating the bathroom of your dreams. With determination and hard work, you can have a brand new bathroom in no time!


